Learn simple yoga stretches for office workers that help relieve desk job pain, improve posture, increase flexibility, and boost productivity throughout the workday.

What Breathing Techniques Are Used in Yoga? A Beginner’s Guide to Better Breathing
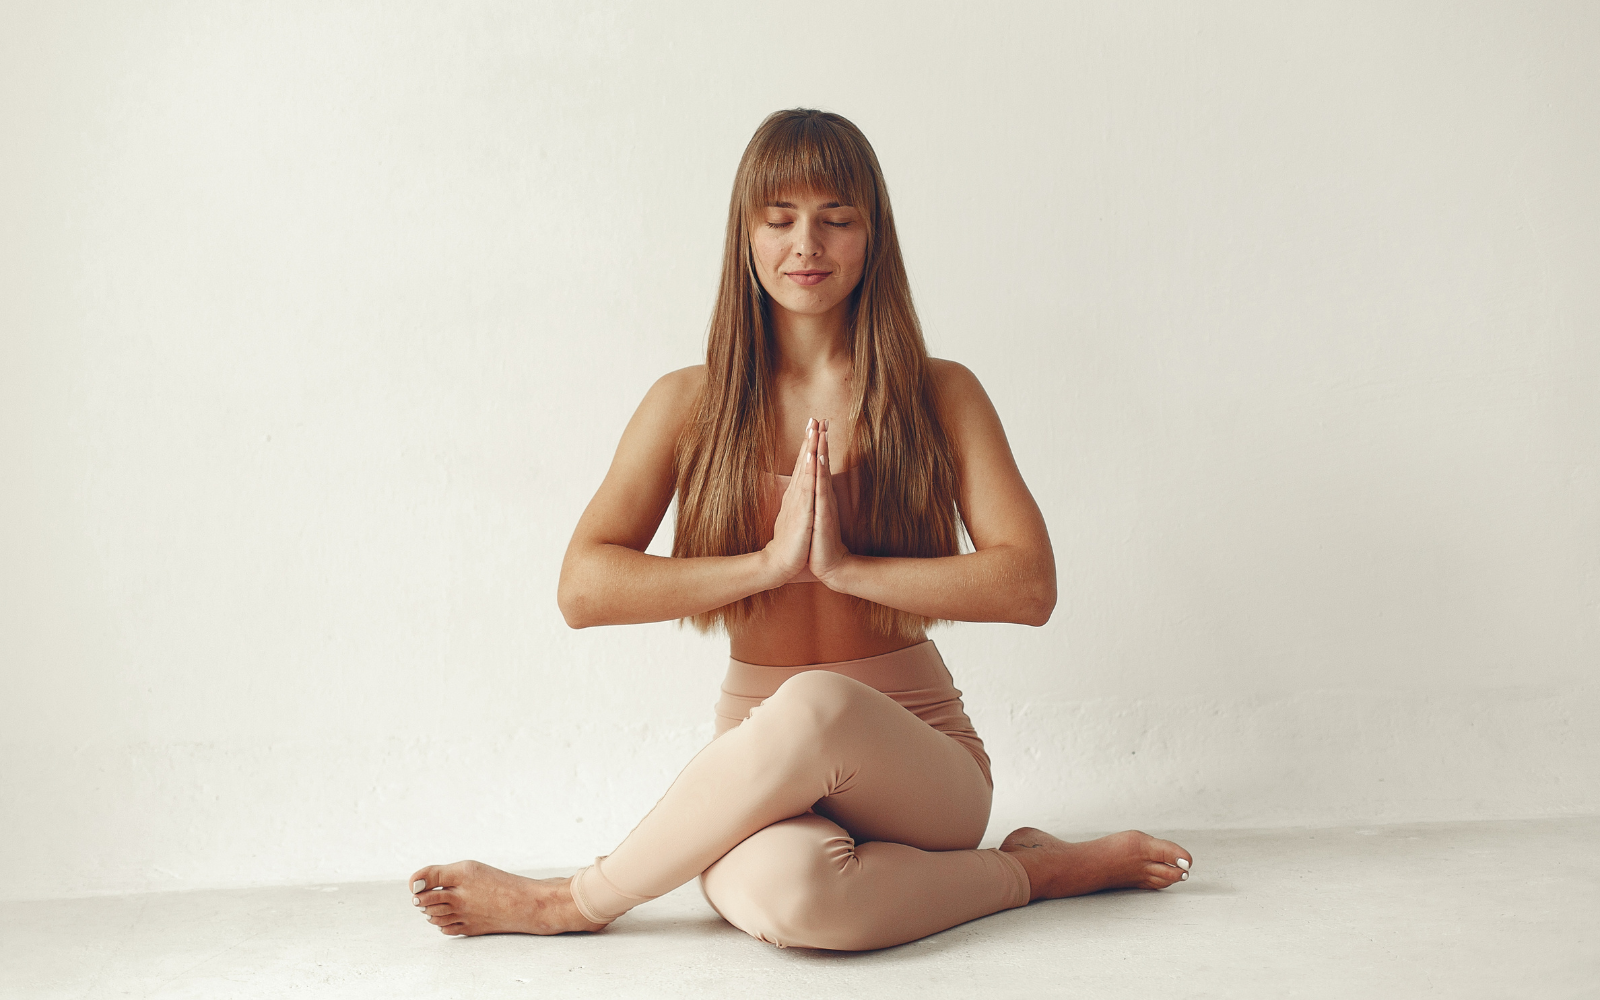
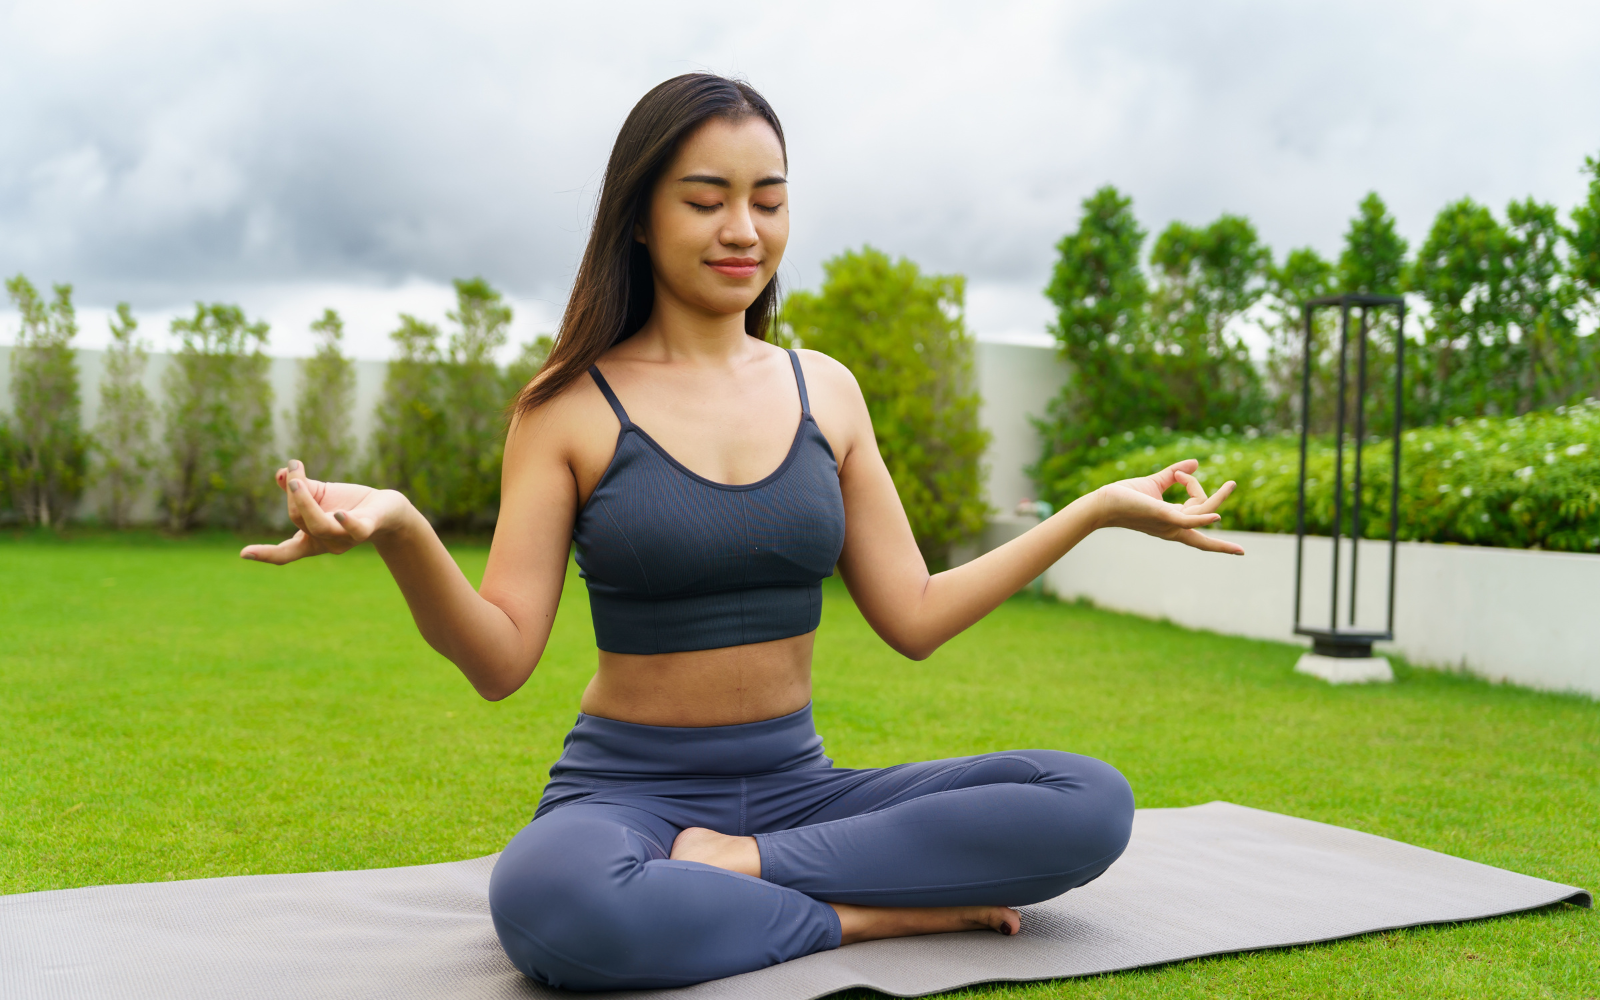
Breathing is the foundation of every yoga practice. While many people focus on stretching and improving flexibility, proper breathing is what connects movement with the mind and body. In yoga, controlled breathing helps improve concentration, increase energy, reduce stress, and make every pose more effective.
Whether you are new to yoga or have been practicing for years, learning different yoga breathing techniques can help you experience greater physical and mental well-being. These breathing exercises are simple to learn and can be practiced at home, in a yoga class, or before meditation.
Why Is Breathing Important in Yoga?
Breathing supplies oxygen to your muscles, organs, and brain. During yoga, slow and controlled breathing helps your body relax while improving balance and coordination. Instead of holding your breath during challenging poses, steady breathing allows you to move safely and comfortably.
Regular breathing practice can also support:
- Better lung function
- Reduced stress and anxiety
- Improved concentration
- Increased energy levels
- Better posture
- Enhanced relaxation
- Improved sleep quality
For these reasons, breathing exercises are considered an essential part of every yoga session.
1. Ocean Breathing
Ocean breathing is one of the most commonly used breathing methods during yoga classes. It involves breathing slowly through the nose while gently narrowing the back of the throat, creating a soft sound similar to ocean waves.
Benefits
- Improves focus during yoga
- Helps maintain a steady breathing rhythm
- Increases body awareness
- Supports longer and smoother yoga sessions
This technique is especially useful during flowing yoga styles where movement follows the breath.
2. Alternate Nostril Breathing
Alternate nostril breathing is a calming exercise that involves breathing through one nostril at a time while gently closing the other.
How to Practice
- Sit comfortably with your back straight.
- Close one nostril and inhale slowly through the other.
- Switch sides and exhale.
- Continue alternating for several rounds.
Benefits
- Promotes mental balance
- Helps reduce stress
- Improves focus
- Encourages calm and steady breathing
Many people practice this technique before meditation or bedtime.
3. Active Cleansing Breath
This breathing exercise uses quick, strong exhalations while allowing the inhalation to happen naturally. It is often practiced in short rounds and should be learned gradually.
Benefits
- Increases energy
- Strengthens the breathing muscles
- Helps improve lung efficiency
- Supports healthy circulation
Beginners should practice gently and stop if they feel uncomfortable.
4. Humming Breath
Humming breath involves making a gentle humming sound while slowly breathing out. The vibration created by the humming sound helps relax the body and quiet the mind.
Benefits
- Reduces mental tension
- Encourages relaxation
- Improves concentration
- Helps calm racing thoughts
This breathing method is excellent after a busy day or before sleep.
5. Energizing Breath
Energizing breath uses strong inhalations and exhalations performed at an even pace. It is commonly used to increase alertness before physical activity.
Benefits
- Boosts energy levels
- Improves oxygen flow
- Supports healthy breathing
- Helps improve focus
People with heart or breathing conditions should consult a healthcare professional before practicing vigorous breathing exercises.
6. Cooling Breath
Cooling breath is designed to help lower body heat and create a refreshing feeling. It is especially helpful during warm weather or after an intense yoga session.
Benefits
- Helps cool the body
- Encourages relaxation
- Supports emotional balance
- Reduces feelings of heat and fatigue
This technique is simple and enjoyable for many beginners.
7. Three-Part Deep Breathing
Three-part deep breathing teaches you to fill the lower, middle, and upper parts of the lungs with each breath. It is often recommended for beginners because it builds healthy breathing habits.
Benefits
- Improves lung capacity
- Encourages full, deep breaths
- Helps reduce shallow breathing
- Supports better posture
- Promotes relaxation
Practicing this exercise for just a few minutes each day can make everyday breathing more efficient.
Tips for Practicing Yoga Breathing Exercises
To get the best results from breathing exercises, keep these simple tips in mind:
- Practice in a quiet and comfortable place.
- Sit or stand with a straight spine.
- Breathe gently through your nose unless instructed otherwise.
- Never force your breathing.
- Start with five to ten minutes each day.
- Stay consistent for lasting benefits.
- Learn advanced breathing methods from a qualified yoga instructor.
How Often Should You Practice?
Even a short daily practice can make a noticeable difference. Spending 10 to 15 minutes each day on breathing exercises can improve relaxation, increase focus, and support overall health. Many yoga practitioners include breathing techniques before beginning physical poses and after finishing their practice to help the body recover.
Conclusion
Breathing is much more than simply taking in air. It is a powerful tool that helps improve physical health, mental clarity, emotional balance, and overall wellness. Learning different yoga breathing techniques can make your yoga practice more effective while helping you manage daily stress and improve your quality of life. Whether your goal is better flexibility, improved focus, or greater relaxation, proper breathing is an important place to begin. To learn these techniques correctly under experienced instructors, explore the professional yoga teacher training programs offered by Yoga Education Institute.
Yoga Poses for Radiant Skin and Healthy Hair
Healthy, glowing skin and strong, beautiful hair are often signs of overall wellness. While skincare products and hair treatments can provide temporary improvements, true beauty begins from within. One of the most effective natural ways to enhance your complexion and support healthy hair is through yoga.
Yoga promotes better blood circulation, reduces stress, improves digestion, and balances hormones—all of which play an important role in maintaining vibrant skin and healthy hair. Regular practice can help nourish skin cells with oxygen-rich blood while strengthening hair follicles by improving nutrient delivery to the scalp.
If you’re looking for a natural beauty routine, here are the best yoga poses for glowing skin and healthier hair growth.
How Yoga Benefits Skin and Hair
Yoga works on multiple levels to improve your overall health, which directly impacts your appearance.
Some key benefits include:
- Improves blood circulation
- Reduces stress hormones
- Enhances oxygen supply
- Promotes detoxification
- Supports hormonal balance
- Improves digestion
- Encourages better sleep
- Reduces inflammation
Together, these benefits contribute to brighter skin and stronger hair.
1. Downward Facing Dog
One of the most popular yoga poses, Downward Facing Dog increases blood flow toward the head, delivering oxygen and nutrients to both the scalp and facial skin.
Benefits
- Boosts scalp circulation
- Refreshes dull-looking skin
- Improves posture
- Relieves fatigue
- Stretches the spine
Hold this pose for 30–60 seconds while maintaining steady breathing.
2. Shoulder Stand
Often called the “Queen of Yoga Poses,” Shoulder Stand improves circulation toward the face and scalp while supporting the endocrine system.
Benefits
- Encourages healthy hair follicles
- Supports skin rejuvenation
- Reduces stress
- Improves thyroid function
- Enhances blood circulation
Beginners should practice under proper guidance.
3. Child’s Pose
Stress is one of the leading causes of acne, premature aging, and hair fall. Child’s Pose encourages deep relaxation.
Benefits
- Reduces cortisol levels
- Promotes relaxation
- Improves breathing
- Supports healthy sleep
- Calms the nervous system
Just five minutes daily can help your body recover from everyday stress.
4. Cobra Pose
This gentle backbend stimulates circulation while opening the chest and improving oxygen intake.
Benefits
- Improves facial circulation
- Encourages collagen production
- Enhances posture
- Stimulates digestion
- Boosts energy
Practice slowly while avoiding excessive strain on the lower back.
5. Fish Pose
Fish Pose stretches the throat, neck, and chest while increasing circulation to the head.
Benefits
- Improves oxygen delivery
- Supports healthy skin
- Relieves tension
- Promotes relaxation
- Enhances breathing capacity
It pairs well with Shoulder Stand for balanced practice.
6. Camel Pose
Camel Pose opens the chest and stretches the front body while encouraging deep breathing.
Benefits
- Improves circulation
- Supports collagen production
- Relieves stress
- Improves posture
- Energizes the body
The improved oxygen flow contributes to healthier-looking skin.
7. Standing Forward Bend
Forward bends naturally increase blood flow toward the face and scalp.
Benefits
- Nourishes hair roots
- Refreshes facial skin
- Improves flexibility
- Relieves anxiety
- Reduces fatigue
Avoid bouncing while holding the stretch.
8. Seated Forward Bend
This calming posture stimulates digestion while helping reduce stress.
Benefits
- Supports detoxification
- Improves metabolism
- Encourages relaxation
- Helps balance hormones
- Promotes overall wellness
Healthy digestion often reflects in clearer skin.
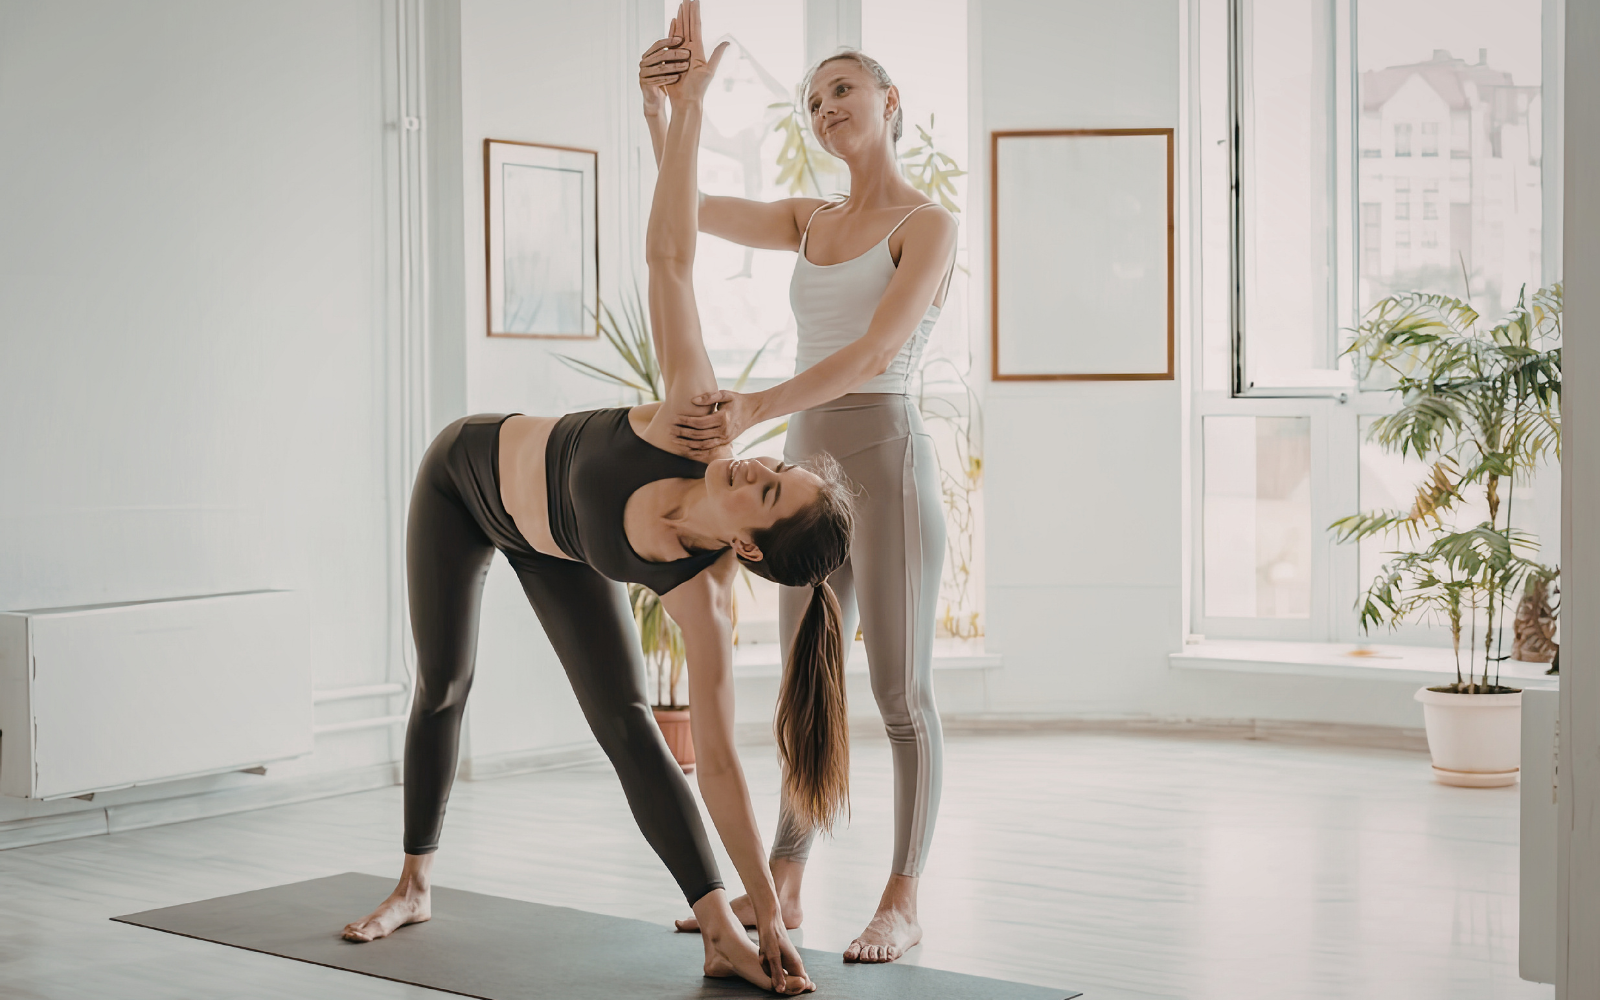
9. Triangle Pose
Triangle Pose improves overall circulation throughout the body.
Benefits
- Enhances blood flow
- Supports skin nourishment
- Strengthens muscles
- Improves flexibility
- Boosts energy
Maintain slow, controlled breathing throughout the pose.
10. Head-to-Knee Pose
This seated posture gently stretches the spine while calming the nervous system.
Benefits
- Improves circulation
- Reduces stress
- Encourages relaxation
- Supports healthy digestion
- Promotes mental clarity
Consistent practice contributes to overall wellness and natural beauty.
Breathing Exercises That Support Healthy Skin
Yoga isn’t only about postures.
Breathing techniques can significantly improve oxygen delivery throughout the body.
Skull Shining Breath
Often called the “Skull Shining Breath,” this technique may help improve circulation and support detoxification.
Alternate Nostril Breathing
Alternate nostril breathing helps balance the nervous system and reduce stress.
Humming Bee Breath
The humming bee breath encourages relaxation and supports emotional well-being.
Practice breathing exercises on an empty stomach under proper guidance.
Lifestyle Habits That Complement Yoga
Yoga works best when combined with healthy daily habits.
Stay Hydrated
Drink enough water throughout the day to keep your skin hydrated.
Eat Nutrient-Rich Foods
Include:
- Fresh fruits
- Leafy vegetables
- Nuts
- Seeds
- Healthy fats
- Protein-rich foods
Sleep Well
Aim for 7–9 hours of quality sleep every night to support skin repair and hair growth.
Manage Stress
Meditation, mindful breathing, and regular exercise help reduce stress-related skin and hair concerns.
Protect Your Skin
Use sunscreen and follow a simple skincare routine suitable for your skin type.
How Often Should You Practice?
For noticeable improvements:
- Practice yoga 4–5 days per week.
- Spend 20–30 minutes per session.
- Include breathing exercises and meditation.
- Stay consistent rather than overexerting yourself.
Results may take several weeks, but regular practice supports long-term wellness.
Safety Tips
Before beginning a yoga routine:
- Warm up properly.
- Avoid forcing difficult poses.
- Listen to your body.
- Practice on a non-slip yoga mat.
- Consult a healthcare provider if you have injuries or medical conditions.
- Learn advanced postures from a qualified instructor.
Safe practice is essential for achieving lasting benefits.
Conclusion
Beautiful skin and healthy hair are often the result of good circulation, balanced hormones, proper nutrition, and effective stress management—all areas where yoga can make a meaningful difference. By incorporating these yoga poses into your weekly routine and maintaining healthy lifestyle habits, you can support your body’s natural ability to nourish your skin and hair from within. Consistency is the key to seeing lasting results. Whether you’re a beginner or an experienced practitioner, guided instruction can help you practice safely and effectively. Begin your wellness journey with Yoga Education Institute and discover how yoga can support both inner health and outer radiance.
Frequently Asked Questions
1. Which yoga pose is best for glowing skin?
Downward Facing Dog, Cobra Pose, and Shoulder Stand are among the most effective poses because they improve blood circulation and oxygen delivery to the face.
2. Can yoga help reduce hair fall?
Yes. Regular yoga practice may reduce stress, improve scalp circulation, and support hormonal balance, which can contribute to healthier hair growth.
3. How long does it take to see results from yoga?
Many people notice improved energy and reduced stress within a few weeks, while visible changes in skin and hair may take 6–12 weeks of consistent practice.
4. Is yoga better than skincare products for glowing skin?
Yoga complements skincare by improving internal health. Combining a consistent yoga routine with proper skincare, hydration, and nutrition often delivers the best results.
5. Can beginners practice these yoga poses?
Yes. Most of these poses are beginner-friendly, but inversions such as Shoulder Stand should be learned under the supervision of a qualified yoga instructor.

Yoga Stretches to Help Reduce Muscle Stiffness: Improve Flexibility and Move Without Pain
Muscle stiffness is a common problem affecting people of all ages. Long hours at a desk, strenuous workouts, poor posture, stress, and a sedentary lifestyle can all contribute to tight muscles and reduced mobility. Fortunately, practicing yoga stretches to help reduce muscle stiffness is a natural and effective way to improve flexibility, relieve tension, and restore comfortable movement.
Yoga combines gentle stretching, controlled breathing, and mindful movement to support healthy muscles and joints. Whether you’re an athlete, office worker, or beginner, adding a few simple yoga stretches to your daily routine can significantly improve your physical well-being.
What Causes Muscle Stiffness?
Muscle stiffness develops when muscles remain contracted or inactive for extended periods. Common causes include:
- Sitting for long hours
- Intense physical activity
- Poor posture
- Aging
- Stress and anxiety
- Lack of regular stretching
- Inadequate hydration
Without proper movement, muscles lose flexibility, making everyday activities more difficult and increasing the risk of injury.
Benefits of Yoga for Muscle Stiffness
Regular yoga practice offers numerous physical and mental benefits that help reduce stiffness naturally.
1. Improves Flexibility
Gentle stretching lengthens muscles and increases the range of motion in joints, making movement easier and more comfortable.
2. Enhances Blood Circulation
Yoga improves circulation, allowing oxygen and nutrients to reach muscles more efficiently while removing metabolic waste that contributes to soreness.
3. Reduces Muscle Tension
Deep breathing combined with mindful stretching helps release chronic muscle tightness caused by stress or repetitive movement.
4. Supports Better Posture
Many stiffness-related problems originate from poor posture. Yoga strengthens the core and back muscles, promoting proper body alignment.
5. Prevents Future Injuries
Flexible muscles and mobile joints are less likely to experience strains, sprains, and overuse injuries.
Best Yoga Stretches to Help Reduce Muscle Stiffness
1. Child’s Pose (Balasana)
Child’s Pose gently stretches the hips, lower back, shoulders, and spine.
How to perform:
- Kneel on the mat.
- Sit back on your heels.
- Extend your arms forward.
- Rest your forehead on the floor.
- Hold for 30–60 seconds.
Benefits:
- Relieves lower back tightness
- Releases shoulder tension
- Promotes relaxation
2. Cat-Cow Stretch (Marjaryasana-Bitilasana)
This dynamic movement increases spinal mobility while reducing stiffness in the neck and back.
Steps:
- Begin on hands and knees.
- Inhale while arching the back and lifting the head.
- Exhale while rounding the spine and tucking the chin.
- Repeat for 8–10 slow breaths.
Benefits:
- Improves spinal flexibility
- Warms up muscles
- Reduces neck and back stiffness
3. Downward-Facing Dog (Adho Mukha Svanasana)
One of the most effective full-body stretches.
Benefits include:
- Lengthens hamstrings
- Stretches calves
- Opens shoulders
- Strengthens arms and legs
- Relieves overall muscle tightness
Hold the pose for 30–45 seconds while breathing steadily.
4. Standing Forward Fold (Uttanasana)
This stretch targets the entire posterior chain.
Benefits:
- Relaxes the spine
- Loosens hamstrings
- Reduces lower back tension
- Encourages blood flow to the head
Bend the knees slightly if your hamstrings feel tight.
5. Cobra Pose (Bhujangasana)
Cobra Pose stretches the chest and abdomen while strengthening the back.
How it helps:
- Opens the front body
- Improves spinal flexibility
- Reduces stiffness from prolonged sitting
- Supports better posture
Avoid overextending the lower back by keeping the elbows slightly bent.
6. Seated Forward Bend (Paschimottanasana)
This calming posture deeply stretches the back body.
Benefits:
- Lengthens hamstrings
- Releases lower back tension
- Improves flexibility
- Calms the nervous system
Move slowly and avoid forcing the stretch.
7. Supine Spinal Twist
Twisting poses gently mobilize the spine and reduce tension around the hips and lower back.
Benefits:
- Improves spinal mobility
- Relieves back stiffness
- Stretches glutes and hips
- Encourages relaxation
Hold each side for about one minute.
Tips for Safe Stretching
To maximize the benefits of yoga, keep these guidelines in mind:
- Warm up before deep stretches.
- Move slowly without bouncing.
- Focus on steady breathing.
- Never stretch into sharp pain.
- Practice consistently for lasting improvements.
- Stay hydrated throughout the day.
Consistency is far more effective than occasional long sessions.
Can Beginners Practice These Yoga Stretches?
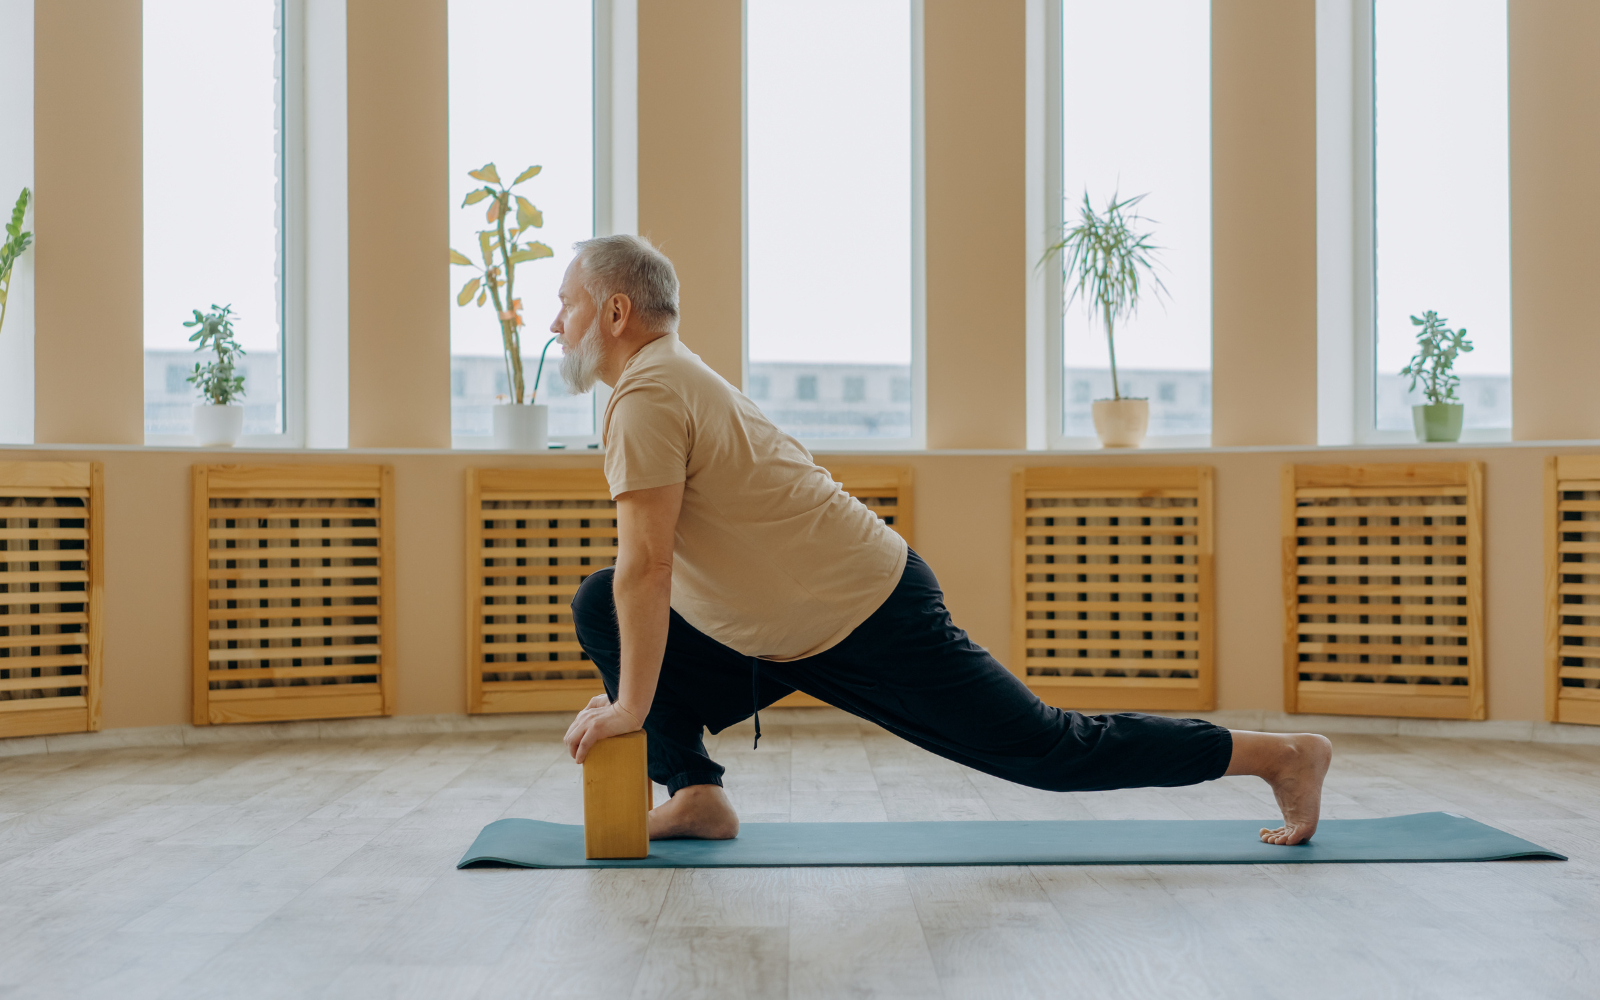
Absolutely. Most of these stretches are beginner-friendly and can be modified according to your flexibility level. Beginners should focus on proper alignment rather than stretching deeply. Using yoga blocks, straps, or folded blankets can make poses more accessible and comfortable.
Learning from experienced instructors also helps beginners build confidence while reducing the risk of injury.
How Yoga Education Supports Better Practice
Understanding body alignment, anatomy, and safe movement is essential for effective yoga practice. Comprehensive yoga teacher training programs teach students how muscles function, how flexibility develops safely, and how to modify poses for different abilities.
A well-designed yoga teacher training curriculum includes anatomy, physiology, biomechanics, sequencing, breathing techniques, meditation, and teaching methodology. These subjects provide a strong foundation for anyone interested in deepening their personal practice or becoming a professional instructor.
Choosing Yoga Alliance certified training ensures that the education follows internationally recognized standards, helping future instructors gain the knowledge and credibility needed to teach confidently.
Daily Routine to Reduce Muscle Stiffness
A simple 15–20 minute routine can make a noticeable difference:
- 2 minutes of deep breathing
- Cat-Cow Stretch
- Child’s Pose
- Downward-Facing Dog
- Standing Forward Fold
- Cobra Pose
- Seated Forward Bend
- Supine Spinal Twist
- Final relaxation for 3–5 minutes
Practicing this sequence consistently can improve flexibility, reduce discomfort, and enhance overall mobility.
Frequently Asked Questions
1. How often should I practice yoga to reduce muscle stiffness?
Practicing 15–30 minutes at least four to five days per week can improve flexibility and reduce muscle tightness over time.
2. Can yoga help with stiffness caused by sitting all day?
Yes. Yoga stretches improve circulation, release tension in the hips, shoulders, neck, and lower back, making it ideal for desk workers.
3. Is yoga better than regular stretching?
Yoga combines stretching with breathing, balance, and mindfulness, offering additional benefits such as stress reduction, improved posture, and greater body awareness.
4. Which yoga pose works best for tight hamstrings?
Standing Forward Fold, Downward-Facing Dog, and Seated Forward Bend are among the most effective poses for improving hamstring flexibility.
5. Can beginners safely perform these stretches?
Yes. Beginners should move slowly, use modifications when needed, and prioritize proper alignment over achieving the deepest stretch.
Conclusion
Adding yoga stretches to help reduce muscle stiffness to your daily routine is one of the simplest ways to improve flexibility, ease discomfort, and support long-term physical health. Regular practice encourages better posture, healthier muscles, and smoother movement while reducing the risk of future injuries. For those looking to deepen their knowledge or pursue a professional path, Yoga Education Institute offers comprehensive programs designed to build a strong foundation in yoga practice and instruction.
Which Yoga Is Best for Hypertension? A Complete Guide to Managing High Blood Pressure Naturally
High blood pressure, also known as hypertension, affects millions of people worldwide and is often called the “silent killer” because it may not show obvious symptoms. Along with medical treatment and a healthy lifestyle, yoga has become one of the most effective natural ways to support heart health and reduce stress-related blood pressure spikes.
If you are wondering which yoga is best for hypertension, the answer lies in gentle, calming practices that focus on relaxation, breathing techniques, and stress reduction rather than intense physical exertion. Let’s explore the most beneficial yoga styles, poses, and breathing exercises for people dealing with high blood pressure.
Understanding Hypertension and Yoga
Hypertension occurs when the force of blood against artery walls remains consistently high. Common causes include:
- Chronic stress
- Poor dietary habits
- Lack of physical activity
- Obesity
- Smoking and alcohol consumption
- Genetic factors
Research suggests that regular yoga practice can help lower stress hormones, improve circulation, support cardiovascular health, and promote relaxation. These benefits can contribute to healthier blood pressure levels when combined with proper medical care.
Best Yoga Styles for High Blood Pressure
1. Hatha Yoga
Hatha Yoga is often considered the best starting point for individuals with hypertension. It emphasizes slow movements, controlled breathing, and gentle stretching.
Benefits include:
- Reduced stress and anxiety
- Improved flexibility
- Better circulation
- Enhanced mind-body awareness
Because of its slower pace, Hatha Yoga is generally safe and accessible for beginners and older adults.
2. Restorative Yoga
Restorative Yoga uses props such as bolsters, blankets, and blocks to support the body in relaxing poses held for extended periods.
Advantages include:
- Deep relaxation
- Reduced nervous system activation
- Lower stress levels
- Improved sleep quality
This style is particularly beneficial for people whose blood pressure rises due to chronic stress.
3. Yin Yoga
Yin Yoga involves holding passive stretches for several minutes while maintaining slow, mindful breathing.
Key benefits:
- Encourages relaxation
- Improves flexibility
- Reduces mental tension
- Supports nervous system balance
The calm nature of Yin Yoga makes it suitable for many individuals managing cardiovascular concerns.
Recommended Yoga Poses for Hypertension
Child’s Pose (Balasana)
This gentle resting posture helps calm the nervous system and promotes relaxation.
Benefits:
- Reduces stress
- Encourages deep breathing
- Relaxes the back and shoulders
Legs-Up-the-Wall Pose (Viparita Karani)
One of the most effective restorative postures, this pose helps improve circulation and reduce fatigue.
Benefits:
- Promotes relaxation
- Reduces swelling in the legs
- Supports healthy blood flow
Bound Angle Pose (Baddha Konasana)
A seated posture that encourages calmness and opens the hips.
Benefits:
- Improves circulation
- Reduces stress
- Enhances flexibility
Cat-Cow Stretch (Marjaryasana-Bitilasana)
This gentle movement synchronizes breath with motion.
Benefits:
- Improves spinal mobility
- Encourages mindful breathing
- Relieves tension
Corpse Pose (Savasana)
Often practiced at the end of a session, Savasana is essential for complete relaxation.
Benefits:
- Lowers stress levels
- Calms the mind
- Supports recovery and relaxation
Breathing Techniques for Blood Pressure Management
Breath control, known as Pranayama, plays a major role in supporting heart health.
Deep Diaphragmatic Breathing
This technique involves slow, controlled breaths using the diaphragm.
Benefits:
- Promotes relaxation
- Reduces stress hormones
- Supports healthy cardiovascular function
Alternate Nostril Breathing (Nadi Shodhana)
A balancing breathing practice that calms the nervous system.
Benefits:
- Reduces anxiety
- Improves mental clarity
- Encourages emotional balance
Bhramari Pranayama (Bee Breath)
This technique involves creating a gentle humming sound during exhalation.
Benefits:
- Calms the mind
- Relieves stress
- Supports relaxation
Yoga Practices to Avoid
People with uncontrolled hypertension should avoid certain advanced practices unless approved by a healthcare professional.
These may include:
- Intense hot yoga sessions
- Advanced inversions such as headstands
- Breath retention exercises
- Fast-paced power yoga classes
- Strenuous sequences that significantly elevate heart rate
Working with a qualified instructor can help ensure modifications are used when necessary.
Lifestyle Tips to Enhance Results
Yoga works best when combined with healthy habits.
Consider the following:
Maintain a Balanced Diet
Focus on:
- Fruits and vegetables
- Whole grains
- Lean proteins
- Low-sodium foods
Stay Physically Active
Combine yoga with:
- Walking
- Swimming
- Light strength training
Improve Sleep Quality
Aim for 7–9 hours of restful sleep each night to support cardiovascular wellness.
Manage Stress
Meditation, mindfulness, and relaxation practices can complement your yoga routine and improve overall well-being.
Creating a Simple Daily Yoga Routine
A beginner-friendly session may include:
- Five minutes of deep breathing
- Child’s Pose – 2 minutes
- Cat-Cow Stretch – 10 repetitions
- Bound Angle Pose – 2 minutes
- Legs-Up-the-Wall Pose – 5 minutes
- Savasana – 10 minutes
Practicing consistently for 20–30 minutes daily can provide noticeable benefits over time.
Conclusion
When considering which yoga is best for hypertension, gentle styles such as Hatha Yoga, Restorative Yoga, and Yin Yoga are among the most effective options. Combined with calming breathing exercises and relaxation techniques, these practices can help reduce stress, improve circulation, and support overall heart health. Consistency is key, and individuals with high blood pressure should always consult their healthcare provider before beginning a new fitness routine. For those interested in expanding their knowledge of yoga and wellness, Yoga Education Institute offers comprehensive training and educational programs designed to support both personal growth and professional development.
FAQs
1. Can yoga lower high blood pressure naturally?
Yoga may help support healthy blood pressure levels by reducing stress, improving circulation, and promoting relaxation when practiced regularly.
2. How often should I practice yoga for hypertension?
Most experts recommend practicing gentle yoga for 20–30 minutes at least 4–5 days per week.
3. Is Hatha Yoga safe for people with high blood pressure?
Yes, Hatha Yoga is generally considered one of the safest and most beneficial styles for individuals managing hypertension.
4. Which breathing exercise is best for hypertension?
Deep diaphragmatic breathing and Alternate Nostril Breathing are commonly recommended because they promote relaxation and nervous system balance.
5. Should people with hypertension avoid inversions?
Individuals with uncontrolled high blood pressure should avoid advanced inversions unless specifically approved by a healthcare professional.
The Evolution of Yoga: From Ancient Practice to Modern Exercise
Yoga has transformed remarkably over thousands of years, evolving from a spiritual discipline practiced by ancient sages into one of the world’s most popular forms of exercise and wellness. Today, millions of people practice yoga for flexibility, strength, stress relief, and overall well-being. Understanding the evolution of yoga helps us appreciate how this ancient tradition continues to adapt while preserving its core principles.
What Is Yoga?
The word “yoga” comes from the Sanskrit root yuj, meaning “to unite” or “to join.” Traditionally, yoga was designed to create harmony between the mind, body, and spirit. It encompasses physical postures, breathing techniques, meditation, and ethical practices that promote holistic health.
In the modern era, yoga has become synonymous with fitness, mindfulness, and healthy living. However, its roots extend far beyond exercise and stretch back thousands of years.
The Ancient Origins of Yoga
Yoga’s history dates back over 5,000 years to ancient India. Archaeological discoveries from the Indus Valley Civilization suggest that early forms of yoga may have existed as far back as 3000 BCE.
The earliest written references to yoga appear in the Vedas, ancient sacred texts that contain spiritual teachings and rituals. During this period, yoga focused primarily on meditation, self-discipline, and spiritual growth rather than physical exercise.
Ancient yogis sought enlightenment through practices that cultivated inner awareness and mental clarity. The goal was to transcend worldly distractions and achieve a deeper connection with the self and the universe.
The Classical Period of Yoga
One of the most significant milestones in yoga’s evolution was the creation of the Yoga Sutras by the sage Patanjali around 200 BCE. These texts systematized yoga philosophy and introduced the concept of the Eight Limbs of Yoga.
The Eight Limbs include:
- Ethical disciplines (Yamas)
- Personal observances (Niyamas)
- Physical postures (Asanas)
- Breath control (Pranayama)
- Sense withdrawal (Pratyahara)
- Concentration (Dharana)
- Meditation (Dhyana)
- Enlightenment (Samadhi)
Interestingly, physical postures occupied only a small part of classical yoga. The primary focus remained on meditation, mental discipline, and spiritual awakening.
The Rise of Hatha Yoga
Between the 9th and 15th centuries, yoga underwent another major transformation with the development of Hatha Yoga. This branch emphasized physical postures and breathing techniques as tools for preparing the body and mind for meditation.
Hatha Yoga introduced many of the yoga poses practiced today. Ancient texts such as the Hatha Yoga Pradipika described techniques designed to improve health, increase vitality, and cultivate inner balance.
This period marked a shift toward recognizing the body’s role in achieving mental and spiritual well-being.
Yoga’s Journey to the West
Yoga began gaining international attention during the late 19th and early 20th centuries. Influential teachers traveled from India to Europe and North America, sharing yogic philosophy and practices with new audiences.
As yoga spread globally, it adapted to different cultural contexts. Western practitioners became particularly interested in yoga’s physical benefits, including flexibility, strength, posture improvement, and stress management.
This growing interest laid the foundation for the modern yoga movement.
Modern Yoga as Exercise
Today, yoga is widely recognized as an effective form of exercise that supports both physical and mental health. Modern yoga classes often focus on movement, fitness, and relaxation while incorporating elements of traditional breathing and mindfulness practices.
Popular styles include:
Vinyasa Yoga
Vinyasa Yoga links breath with movement in a flowing sequence of poses. It is popular among individuals seeking a dynamic workout that improves cardiovascular fitness and flexibility.
Power Yoga
Power Yoga is a vigorous, fitness-oriented style that builds strength, endurance, and muscle tone. It appeals to those looking for a challenging exercise routine.
Yin Yoga
Yin Yoga involves holding poses for extended periods to target deep connective tissues and enhance flexibility while promoting relaxation.
Restorative Yoga
Restorative Yoga uses props and gentle postures to encourage deep rest, stress relief, and recovery.
Hot Yoga
Practiced in a heated room, Hot Yoga aims to increase flexibility and promote sweating while enhancing physical endurance.
Benefits of Modern Yoga
The popularity of yoga continues to grow because of its wide-ranging benefits:
Improved Flexibility
Regular yoga practice increases joint mobility and muscle flexibility, helping reduce stiffness and improve movement quality.
Enhanced Strength
Many yoga poses engage multiple muscle groups simultaneously, building functional strength and stability.
Better Mental Health
Yoga encourages mindfulness and relaxation, which can help reduce stress, anxiety, and emotional tension.
Improved Balance and Posture
Yoga strengthens core muscles and enhances body awareness, leading to better posture and balance.
Increased Energy Levels
Combining movement, breathwork, and meditation can boost energy and improve overall vitality.
Better Sleep Quality
Many practitioners report improved sleep patterns due to yoga’s calming effects on the nervous system.
Technology and the Future of Yoga
The digital age has further transformed yoga. Online yoga classes, mobile apps, virtual teacher training programs, and live-streamed sessions have made yoga accessible to people worldwide.
Technology allows practitioners to learn from experienced instructors regardless of location, making yoga more inclusive than ever before.
At the same time, there is growing interest in preserving yoga’s traditional roots by integrating philosophy, meditation, and mindfulness into modern practice. This balance between tradition and innovation is likely to shape yoga’s future.
Why Yoga Remains Relevant Today
Despite its evolution, yoga continues to offer timeless benefits. Whether practiced for spiritual growth, stress relief, fitness, or overall wellness, yoga provides tools that help individuals navigate the challenges of modern life.
Its adaptability is one of its greatest strengths. Yoga can be modified for beginners, athletes, seniors, children, and individuals with varying fitness levels, making it one of the most accessible forms of exercise available.
Conclusion
The evolution of yoga from an ancient spiritual practice to a modern exercise phenomenon demonstrates its enduring value and versatility. While contemporary yoga often emphasizes physical fitness, its deeper principles of mindfulness, balance, and self-awareness remain at its core. By embracing both its traditional wisdom and modern applications, yoga continues to inspire millions of people on their journey toward better health and well-being.
For those looking to deepen their knowledge and practice, the Yoga Education Institute offers comprehensive yoga training programs designed to connect traditional yogic wisdom with modern teaching methodologies.
Yoga for Women’s Health: Hormones, Strength, and Self-Care
Women’s health is deeply connected to physical movement, emotional balance, hormone regulation, and daily self-care habits. In today’s fast-paced lifestyle, many women experience stress, fatigue, hormonal imbalance, poor sleep, and muscle tension. Yoga has become one of the most effective natural wellness practices for supporting both the body and mind at every stage of life.
From young adults to mothers and older women, yoga offers gentle yet powerful benefits that improve flexibility, mental clarity, strength, and overall well-being. In areas like Woodland Hills, CA, where wellness-focused living continues to grow, more women are turning to yoga classes and holistic health programs to support healthier lifestyles.
How Yoga Supports Women’s Health
Yoga combines physical postures, mindful breathing, and relaxation techniques that work together to support the nervous system and hormonal balance. Unlike high-impact workouts, yoga encourages the body to heal while improving mobility and strength naturally.
Many women practice yoga to help with:
- Stress and anxiety management
- Hormonal balance
- Better sleep quality
- Improved flexibility
- Core and pelvic strength
- Menstrual discomfort
- Emotional wellness
- Energy and focus
Research and wellness communities continue to highlight yoga’s positive effects on women’s physical and emotional health. (reddit.com)
Yoga and Hormonal Balance
Hormones affect nearly every system in the body, including mood, metabolism, sleep, reproductive health, and energy levels. Stress is one of the biggest factors that can disrupt hormonal balance. Yoga helps activate the parasympathetic nervous system, often called the “rest and relax” response, which may help reduce stress hormones naturally.
Gentle yoga practices combined with breathwork can support:
- Reduced cortisol levels
- Improved emotional balance
- Better sleep cycles
- Reduced tension and fatigue
- Relaxation during PMS and menopause
Restorative yoga, meditation, and pranayama are especially beneficial for calming the nervous system and supporting mental wellness.
Building Strength Through Yoga
Many people think yoga is only about stretching, but it is also highly effective for building strength and stability. Yoga postures engage multiple muscle groups at once while improving balance and posture.
Women who practice yoga regularly may experience improved:
- Core strength
- Muscle tone
- Joint mobility
- Balance and coordination
- Postural alignment
- Bone and spine support
Strength-focused yoga styles like Vinyasa and Power Yoga can help improve endurance while still maintaining mindfulness and body awareness.
Self-Care and Mental Wellness
Self-care is more than spa treatments or relaxation days. True self-care means creating healthy routines that support long-term physical and emotional health. Yoga encourages mindfulness, body awareness, and intentional breathing, helping women reconnect with themselves mentally and emotionally.
In busy communities like Woodland Hills, CA, many women use yoga as part of their daily wellness routine to reduce stress and improve work-life balance. A regular yoga practice can create time for reflection, calmness, and emotional reset.
Meditation and mindful breathing often help improve:
- Mental clarity
- Emotional resilience
- Focus and concentration
- Inner calm
- Confidence and self-awareness
Even practicing yoga for 20 to 30 minutes daily can positively impact emotional health.
Yoga for Different Stages of Life
One of the greatest benefits of yoga is that it adapts to every stage of life. Women can modify yoga practices based on age, fitness level, and wellness goals.
Prenatal Yoga
Prenatal yoga supports expecting mothers with gentle movement, breath awareness, and relaxation techniques designed for pregnancy wellness.
Postnatal Yoga
After childbirth, yoga can help women rebuild strength, improve posture, and support emotional recovery.
Menopause Support
Many women use yoga to manage menopause symptoms such as stress, sleep difficulties, mood changes, and stiffness.
Healthy Aging
Yoga also promotes flexibility, balance, and mobility for older women seeking healthy aging and active lifestyles.
Popular Yoga Styles for Women’s Wellness
Different yoga styles offer different benefits depending on personal goals and experience levels.
Hatha Yoga
A slower-paced practice ideal for beginners and stress reduction.
Vinyasa Yoga
A flowing style that improves cardiovascular fitness and muscle tone.
Restorative Yoga
Focuses on deep relaxation using props and gentle stretches.
Targets connective tissues and improves flexibility through long-held poses.
Prenatal Yoga
Designed specifically for the physical and emotional needs of pregnancy.
Finding the right style can help women create a sustainable and enjoyable wellness routine.
Creating a Consistent Yoga Practice
Consistency is more important than intensity. Women do not need advanced poses or long sessions to experience yoga’s benefits. Starting with a few classes each week can improve overall wellness over time.
Helpful tips for building a yoga habit include:
- Practice at the same time daily
- Create a calm yoga space at home
- Focus on progress, not perfection
- Listen to your body’s needs
- Combine movement with mindful breathing
The goal of yoga is not competition but long-term balance and self-awareness.
Conclusion
Yoga continues to be one of the most effective natural approaches for supporting women’s health, emotional balance, strength, and self-care. Whether you are managing stress, improving flexibility, building strength, or creating healthier daily habits, yoga offers lifelong wellness benefits for women of all ages.
For those looking to deepen their yoga knowledge or pursue professional training in Woodland Hills, CA, Yoga Education Institute provides comprehensive yoga education programs designed to support personal growth and professional development.
FAQs
1. Is yoga good for hormonal imbalance?
Yoga may help reduce stress and support relaxation, which can positively affect hormonal balance and emotional wellness.
2. Which yoga style is best for women’s health?
Hatha, Restorative, Yin, and Prenatal Yoga are commonly recommended for women’s wellness and stress management.
3. Can yoga improve strength and flexibility?
Yes, regular yoga practice can improve muscle tone, flexibility, posture, and overall body strength.
4. How often should women practice yoga?
Practicing yoga 3–5 times per week can provide noticeable physical and mental wellness benefits.
5. Is yoga helpful during menopause?
Many women use yoga to manage stress, improve sleep, reduce stiffness, and support emotional balance during menopause.
How Daily Yoga Practice Improves Mental Health and Reduces Stress
In today’s fast-paced world, the mind is constantly stimulated—notifications, responsibilities, and emotional pressures can quietly build into stress and anxiety. As a yoga educator, I often guide students toward one simple yet powerful habit: daily yoga practice. Even a short, consistent routine can create profound shifts in mental clarity, emotional balance, and inner calm.
Let us explore how this gentle discipline supports mental well-being and helps reduce stress in a sustainable, natural way.
1. Calms the Nervous System
Yoga works directly with the breath and body to regulate the nervous system. When you practice slow movements combined with mindful breathing, the body shifts from a “fight or flight” state to a “rest and digest” mode.
Simple techniques like deep breathing or alternate nostril breathing help lower cortisol levels (the stress hormone). Over time, your body learns to respond more calmly to daily challenges rather than reacting impulsively.
2. Enhances Emotional Awareness
Daily yoga creates space for self-observation. As you move through postures and stillness, you begin to notice your thoughts, emotions, and patterns without judgment.
This awareness is powerful. It allows you to:
- Recognize stress triggers
- Respond thoughtfully instead of reacting
- Build emotional resilience
Instead of suppressing feelings, yoga teaches you to acknowledge and release them gently.
3. Improves Breathing Patterns
Many people under stress develop shallow, rapid breathing without realizing it. This can increase anxiety and mental tension.
Through pranayama (breathing exercises), yoga encourages:
- Deep, slow breathing
- Better oxygen flow to the brain
- Reduced heart rate
A few minutes of conscious breathing each day can significantly calm the mind and improve focus.
4. Reduces Anxiety and Overthinking
One of the biggest mental challenges today is overthinking. The mind constantly jumps between past worries and future fears.
Yoga anchors you in the present moment.
When you focus on:
- Your breath
- Body alignment
- Gentle movements
…the mind naturally slows down. This reduces mental clutter and creates a sense of clarity and peace.
5. Releases Physical Tension Stored in the Body
Stress is not just mental—it is stored in the body. Tight shoulders, stiff neck, and lower back discomfort are common signs.
Daily yoga helps release this tension through:
- Stretching
- Gentle movement
- Relaxation poses
As the body relaxes, the mind follows. This connection is essential for overall mental health.
6. Promotes Better Sleep
Stress often leads to poor sleep quality. A restless mind can make it difficult to fall asleep or stay asleep.
Practicing yoga daily, especially in the evening, can:
- Calm the mind before bedtime
- Reduce racing thoughts
- Improve sleep patterns
Even 10–15 minutes of gentle stretches or breathing can prepare your body for deep rest.
7. Boosts Mood Naturally
Yoga stimulates the release of “feel-good” chemicals like serotonin and endorphins. These help elevate mood and reduce feelings of sadness or irritability.
With regular practice, many people experience:
- Increased positivity
- Greater emotional stability
- A sense of inner joy
This natural upliftment makes yoga a powerful tool for mental wellness.
8. Builds Discipline and Routine
Mental health improves when there is consistency in daily habits. Yoga encourages a structured yet flexible routine.
When you commit to practicing daily:
- You create time for yourself
- You develop self-discipline
- You feel more in control of your life
Even a short session each day/ can create a strong foundation for mental balance.
9. Encourages Mind-Body Connection
Yoga is not just physical exercise—it is a holistic practice that connects mind, body, and breath.
This connection helps you:
- Become more aware of your needs
- Recognize early signs of stress
- Take proactive steps to restore balance
Over time, this awareness becomes a lifelong skill.
Simple Daily Practice Tips
If you are just beginning, keep your routine simple and sustainable:
- Start with 10–20 minutes daily
- Include gentle stretches and basic postures
- Practice deep breathing for 5 minutes
- End with relaxation (Savasana)
Consistency is more important than intensity.
Conclusion
Daily yoga is a gentle yet powerful way to support mental health and reduce stress naturally. It helps calm the nervous system, improve emotional awareness, and bring balance to both body and mind. With regular practice, you will begin to notice subtle but meaningful changes—more peace, better focus, and a deeper connection with yourself.
If you are looking to deepen your practice or guide others on this journey, structured learning can make a big difference. Programs offered by Yoga Education Institute provide comprehensive knowledge and practical tools to integrate yoga into everyday life and teaching.
FAQs
1. How long should I practice yoga daily for mental health?
Even 15–20 minutes daily can be effective. Consistency matters more than duration.
2. Can yoga replace therapy for stress and anxiety?
Yoga is a supportive practice but not a replacement for professional treatment when needed. It works best alongside other forms of care.
3. Which type of yoga is best for stress relief?
Gentle styles like Hatha, Restorative, and Yin yoga are excellent for calming the mind.
4. How quickly can I see results from daily yoga?
Many people feel calmer after just one session, but noticeable long-term benefits usually appear within a few weeks.
5. Is yoga suitable for beginners with no experience?
Yes, yoga is beginner-friendly. Start with simple poses and gradually build your practice.
Beginner’s Guide to Yoga: Poses, Benefits, and Common Mistakes
Yoga has become one of the most popular wellness practices worldwide—and for good reason. Whether your goal is to improve flexibility, reduce stress, or build strength, yoga offers a holistic approach to physical and mental well-being. If you’re new to yoga, this beginner-friendly guide will walk you through essential poses, key benefits, and common mistakes to avoid so you can start your journey with confidence.
What Is Yoga?
Yoga is an ancient practice that combines physical postures, breathing techniques, and mindfulness. Today, it is widely recognized for its ability to improve both physical health and mental clarity. Beginners often start with simple poses and gradually progress to more advanced sequences.
Top Benefits of Yoga for Beginners
1. Improves Flexibility
One of the most searched benefits of yoga is improved flexibility. Regular practice helps loosen tight muscles and increases your range of motion.
2. Reduces Stress and Anxiety
Yoga incorporates deep breathing and meditation, which are proven to lower cortisol levels and promote relaxation.
3. Enhances Strength and Balance
Many yoga poses require you to support your body weight, helping build muscle strength and improve balance.
4. Boosts Mental Focus
Mindfulness in yoga helps sharpen concentration and enhances mental clarity.
5. Supports Better Posture
Yoga strengthens core muscles and aligns your body, reducing back and neck pain caused by poor posture.
Essential Yoga Poses for Beginners
If you’re just starting, focus on these basic yoga poses that are easy yet highly effective.
This foundational pose helps improve posture and balance. Stand tall with your feet together and arms at your sides, focusing on steady breathing.
2. Downward Dog (Adho Mukha Svanasana)
A popular beginner yoga pose that stretches the entire body. It strengthens arms and legs while improving flexibility.
3. Child’s Pose (Balasana)
Perfect for relaxation, this pose gently stretches your back and hips while calming the mind.
4. Warrior I (Virabhadrasana I)
This powerful pose builds strength in your legs and improves focus and stability.
5. Cat-Cow Stretch (Marjaryasana-Bitilasana)
A gentle flow between two poses that warms up the spine and improves flexibility.
How to Start Yoga at Home
Starting yoga at home is easier than ever. Follow these beginner tips:
Choose a quiet space: Ensure you have enough room to move freely.
Use a yoga mat: It provides comfort and prevents slipping.
Wear comfortable clothing: Stretchable clothes help you move easily.
Follow online classes: Beginner yoga videos can guide your practice.
Start slow: Begin with 10–15 minutes daily and gradually increase duration.
Common Yoga Mistakes Beginners Should Avoid
Even though yoga seems simple, beginners often make mistakes that can affect progress or cause injury.
1. Skipping Warm-Up
Jumping straight into poses without warming up can strain muscles. Always start with gentle stretches.
2. Ignoring Breathing
Breathing is a core part of yoga. Holding your breath can reduce the effectiveness of your practice.
3. Comparing Yourself to Others
Yoga is a personal journey. Avoid comparing your progress with others, especially in classes or online videos.
4. Overstretching
Pushing your body too hard can lead to injuries. Listen to your body and respect its limits.
5. Poor Alignment
Incorrect posture can reduce benefits and cause discomfort. Focus on proper alignment rather than depth in poses.
Tips for Staying Consistent with Yoga
Consistency is key to seeing results in yoga. Here are some tips to stay motivated:
- Set a fixed time daily for practice
- Start with short sessions and increase gradually
- Track your progress
- Join a yoga community or online group
- Practice mindfulness along with physical poses
Yoga for Weight Loss and Fitness
Yoga is also widely searched for weight loss and fitness. While it may not burn calories as quickly as high-intensity workouts, it helps regulate metabolism, improve digestion, and reduce stress-related eating. Power yoga and vinyasa flow are great options for those looking to lose weight.
Yoga and Mental Health
Yoga is highly effective for mental health. Regular practice can help with:
- Reducing anxiety and depression
- Improving sleep quality
- Enhancing emotional balance
- Increasing self-awareness
The combination of breathing exercises and meditation plays a crucial role in achieving mental peace.
Conclusion
Yoga is a powerful practice that benefits both the body and mind. As a beginner, focus on learning basic poses, maintaining proper form, and practicing regularly. Avoid common mistakes and progress at your own pace. With consistency and patience, yoga can transform your overall well-being and lifestyle. To deepen your knowledge and explore structured learning, you can visit https://yogaeducation.org/
FAQs About Yoga for Beginners
1. How often should beginners do yoga?
Beginners should aim for at least 3–4 sessions per week, starting with 15–30 minutes per session.
2. Can I do yoga every day?
Yes, daily yoga practice is safe if you listen to your body and avoid overexertion.
3. Do I need to be flexible to start yoga?
No, flexibility is a result of yoga, not a requirement. Anyone can start regardless of fitness level.
4. What is the best time to practice yoga?
Early morning is ideal, but you can practice anytime that fits your schedule.
5. Is yoga enough for weight loss?
Yoga supports weight loss by improving metabolism and reducing stress, but combining it with a healthy diet enhances results.
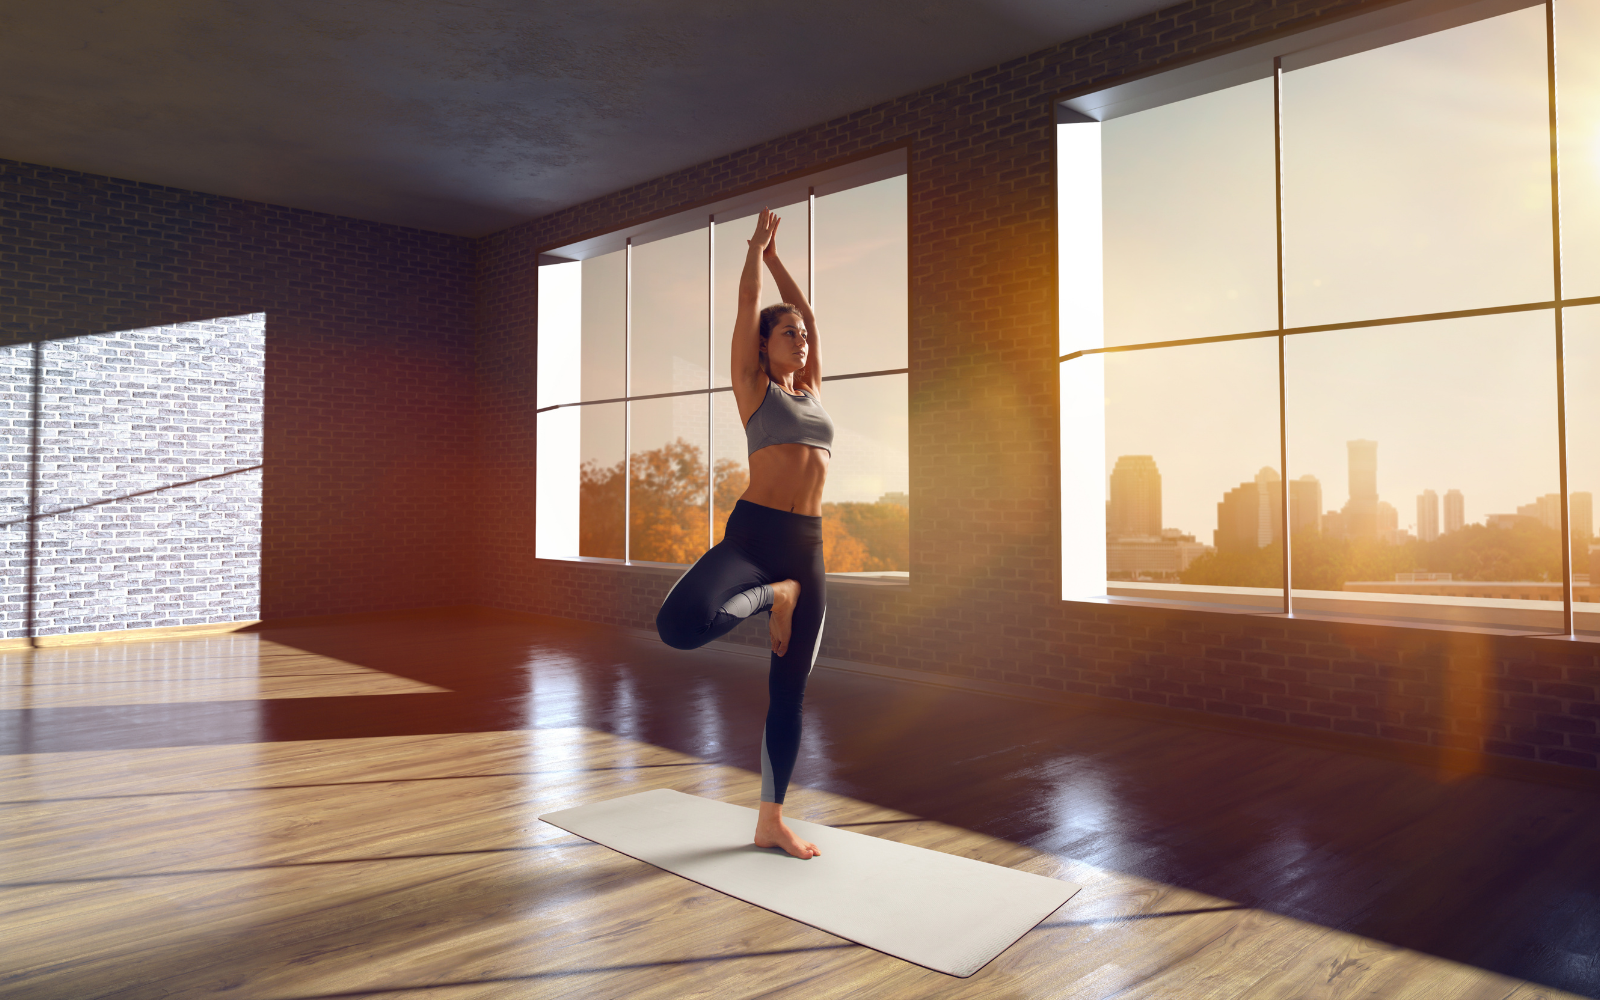
15-Minute Morning Yoga Routine for Energy, Focus, and Productivity
Starting your day with a morning yoga routine at home is one of the most powerful habits you can build for physical health and mental clarity. Whether you’re looking for a morning yoga routine for beginners or a structured 30-minute morning yoga routine, yoga helps awaken your body, improve flexibility, and sharpen focus for the day ahead.
In today’s fast-paced lifestyle, even a morning yoga routine 10 minutes long can create noticeable improvements in energy, posture, and productivity. Let’s explore how you can design the perfect routine that works for everyone—including men, women, and beginners.
Why a Morning Yoga Routine Matters
Practicing yoga in the morning has both physical and mental benefits. It helps stimulate blood circulation, loosen stiff muscles, and improve focus before your day begins. According to yoga experts, even a few rounds of movement can boost metabolism, enhance flexibility, and reduce stress levels .
A consistent morning yoga routine for flexibility also trains your body to move better throughout the day. Plus, syncing breath with movement creates a meditative state that improves emotional balance and concentration.
Morning Yoga Routine for Beginners (10–15 Minutes)
If you’re new to yoga, start simple. A morning yoga routine for beginners should focus on gentle stretching and breathing.
Step-by-step beginner flow:
- Deep Breathing (2 minutes)
Sit comfortably and focus on slow inhales and exhales. - Neck & Shoulder Rolls (2 minutes)
Release tension built up during sleep. - Cat-Cow Stretch (2 minutes)
Improves spine mobility and warms up the body. - Downward Dog (2 minutes)
Stretches hamstrings and strengthens arms. - Child’s Pose (2 minutes)
Helps relax and reset the body. - Standing Forward Fold (2 minutes)
Enhances flexibility and blood flow.
This simple morning yoga routine at home is perfect if you’re short on time but still want maximum benefits.
Morning Yoga Routine Sun Salutation (Core Practice)
The backbone of any effective yoga session is the morning yoga routine sun salutation (Surya Namaskar). This sequence includes 12 poses that flow together seamlessly and provide a full-body workout.
Key benefits:
- Full-body stretch and strength
- Improved flexibility and posture
- Better focus and mindfulness
- Increased energy levels
Even practicing 3–6 rounds can energize your entire body and mind for the day.
30 Minute Morning Yoga Routine (Advanced Flow)
If you have more time, a 30-minute morning yoga routine can take your practice deeper.
Suggested structure:
- 5 minutes: Breathing + warm-up
- 15 minutes: Sun salutations (8–10 rounds)
- 5 minutes: Standing poses (Warrior I & II)
- 5 minutes: Cool down + meditation
This extended routine improves endurance, builds strength, and enhances mental clarity.
Morning Yoga Routine for Men
A morning yoga routine for men often focuses on strength, mobility, and stress relief. Men tend to have tighter hamstrings and hips, so incorporating poses like
- Downward Dog
- Plank
- Lunges
- Cobra Pose
…can improve flexibility and prevent injuries. Regular practice also boosts stamina and posture.
Morning Yoga Routine for Women
A morning yoga routine for women typically emphasizes flexibility, balance, and hormonal wellness. Gentle flows combined with stretching can:
- Improve core strength
- Support weight management
- Reduce stress and anxiety
Poses like Child’s Pose, Cat-Cow, and hip openers are especially beneficial.
Morning Yoga Routine for Flexibility
If your goal is flexibility, consistency is key. A focused morning yoga routine for flexibility should include:
- Forward folds
- Hip openers
- Backbends
- Hamstring stretches
Over time, these movements lengthen muscles and improve range of motion, making daily activities easier.
Tips for a Successful Morning Yoga Practice
- Practice on an empty stomach
- Start slow and gradually increase intensity
- Focus on breathing with each movement
- Stay consistent—even 10 minutes daily helps
- Choose a quiet, well-ventilated space
Yoga experts recommend practicing in the morning because it helps “wake up muscles, boost circulation, and set a calm tone for the day” .
FAQs (Trending & High-Search Questions)
1. What is the best morning yoga routine at home?
The best routine includes breathing, stretching, and sun salutations. Even 10–15 minutes daily can improve energy and flexibility.
2. Is a 10-minute morning yoga routine effective?
Yes, a morning yoga routine 10 minutes long can boost circulation, reduce stiffness, and improve focus when practiced consistently.
3. How many sun salutations should I do in the morning?
Beginners can start with 3–5 rounds, while advanced practitioners may do 10–12 rounds depending on fitness level .
4. Can beginners do a morning yoga routine daily?
Absolutely. A morning yoga routine for beginners should start with gentle poses and gradually progress over time.
5. Is morning yoga better than evening yoga?
Morning yoga energizes and prepares you for the day, while evening yoga helps relaxation. Both are beneficial, but mornings are ideal for productivity.
Conclusion
Building a consistent yoga habit doesn’t require hours—just commitment. Whether you follow a morning yoga routine at home, a quick morning yoga routine 10 minutes, or a full 30 minute morning yoga routine, the key is consistency.
Start small, stay consistent, and gradually deepen your practice. Over time, you’ll notice improved energy, better focus, and enhanced overall well-being.
To take your practice further, explore structured guidance from Yoga Education Institute through this helpful resource: https://yogaeducation.org/