

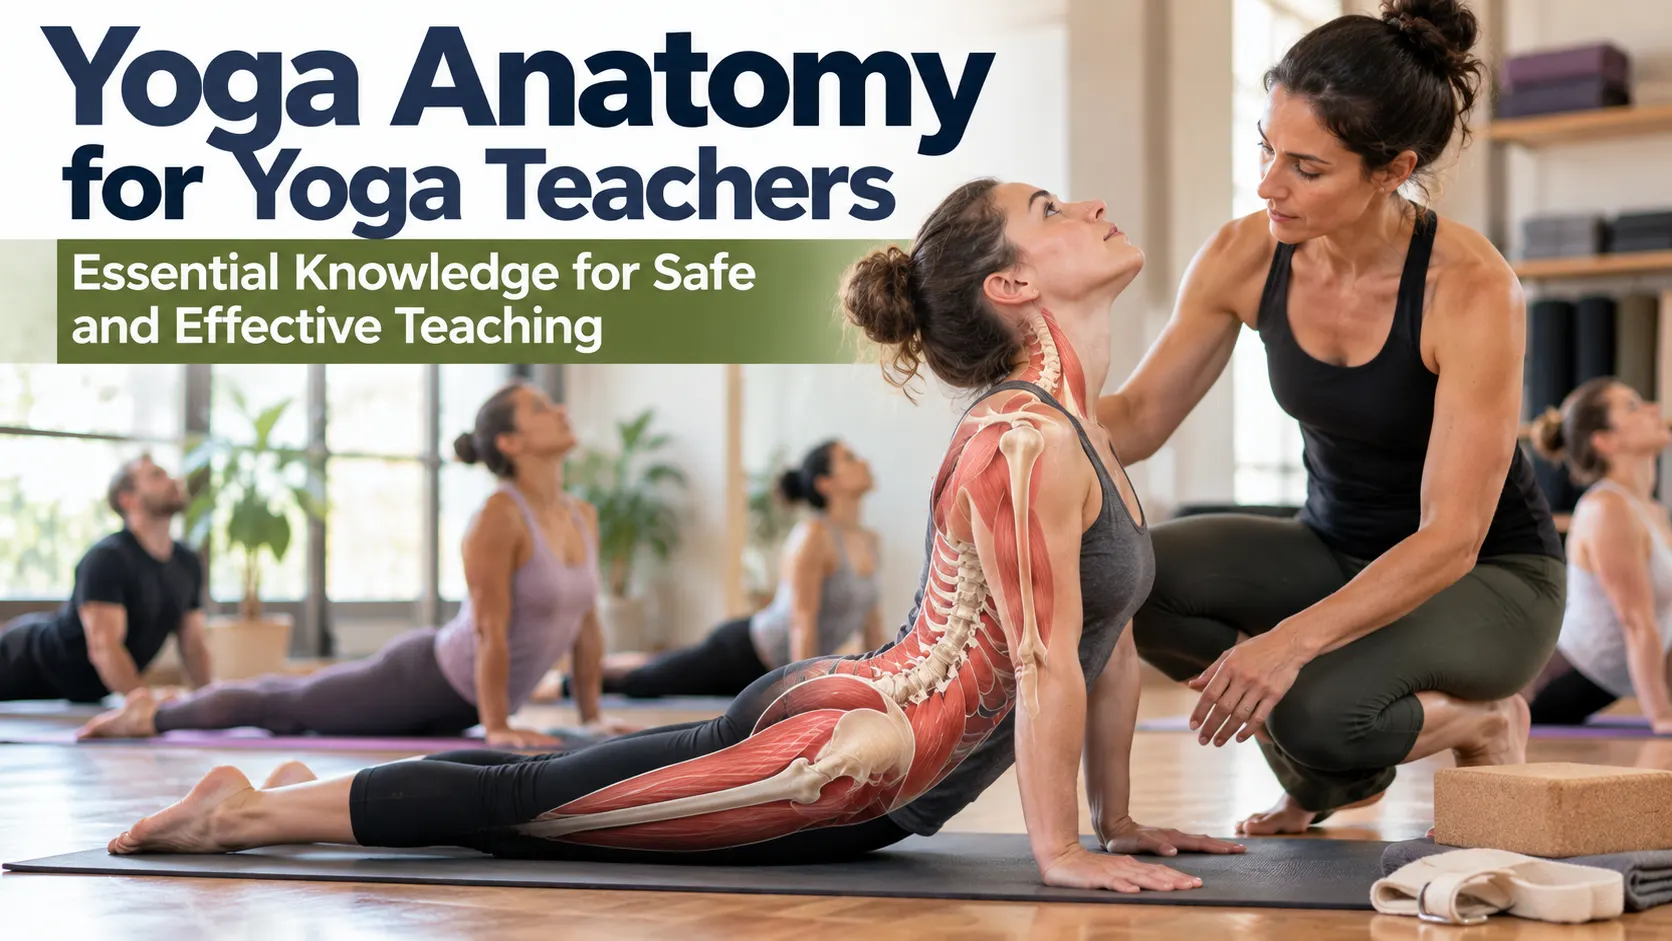
Understanding the human body is one of the most valuable skills a yoga teacher can develop. Knowing how muscles, joints, bones, and movement patterns work helps teachers explain postures more clearly, choose appropriate modifications, and create classes that respect individual differences.
For new yoga teachers, anatomy can initially seem complicated. You may encounter unfamiliar terms such as flexion, extension, rotation, mobility, stability, and range of motion. You may also wonder how much anatomy you need to know before you can confidently guide students through a yoga class.
The good news is that you do not need to become a medical professional to teach yoga responsibly. You do, however, need a practical understanding of movement, common anatomical differences, and the limits of your role as a yoga teacher.
Yoga anatomy for yoga teachers is about understanding how bodies move, recognizing that students have different needs, and making informed teaching decisions rather than forcing everyone into the same posture.
Whether you are preparing for your first teaching practice or developing your existing skills, this guide explains the essential anatomy concepts that can support safer, more effective yoga instruction.
If you are considering formal training, explore this 200-hour yoga teacher training program to learn more about developing the foundations of yoga teaching.
What Is Yoga Anatomy?
Yoga anatomy is the study of the structures and movement patterns of the human body as they relate to yoga practice.
It includes understanding the bones, joints, muscles, connective tissues, and nervous system involved in movement, balance, strength, and flexibility.
For a yoga teacher, anatomy helps answer practical questions:
- Which body movements does a particular pose involve?
- Which muscles may contribute to the movement?
- What limitations might affect a student’s experience?
- How can a pose be modified to make it more accessible?
- When should a student stop or choose a different movement?
- How can a teacher avoid giving instructions that do not suit every body?
Consider Downward-Facing Dog. Students may experience this posture differently because of differences in shoulder mobility, wrist comfort, hamstring flexibility, proportions, and previous experience.
A teacher with a basic understanding of anatomy can offer alternatives instead of assuming that every student should achieve the same shape.
Anatomy therefore supports practical teaching decisions rather than simply adding scientific terminology to a class.
Why Is Anatomy Important for Yoga Teachers?
Anatomy can improve the quality of yoga instruction in several ways.
1. It Helps Teachers Understand Movement
When you understand basic joint actions, you can explain what students are doing rather than relying entirely on visual descriptions.
For example, raising an arm overhead involves movement at the shoulder complex, including the shoulder blade and upper arm. It is not simply a matter of lifting the hand.
Understanding this relationship can help teachers provide clearer cues and recognize when a movement may need to be adjusted.
2. It Supports Individualized Modifications
Students do not have identical bodies.
They differ in limb proportions, joint structure, strength, mobility, previous injuries, and comfort levels.
Anatomical knowledge helps you understand why a pose may feel different for two people and why one modification may work well for one student but not another.
3. It Improves Class Sequencing
A yoga sequence should prepare students for its physical demands.
If your class includes standing balances, you might incorporate gradual weight-bearing, foot awareness, and balance preparation.
If your class includes shoulder-intensive poses, you may choose appropriate preparation for the shoulders, wrists, and upper body.
The aim is not to guarantee injury prevention. It is to make informed choices about progression, intensity, and movement preparation.
4. It Encourages Better Communication
Anatomy helps teachers move beyond vague statements such as “put your body in the right position.”
Instead, you can give practical instructions about movement, support, comfort, and available options.
5. It Helps Teachers Recognize Their Limits
A yoga teacher should not diagnose injuries, prescribe treatment, or claim that a particular pose will cure a medical condition.
Understanding anatomy can help you recognize when a question falls outside your qualifications and when a student should seek advice from an appropriately qualified healthcare professional.
Understanding the Spine and Its Movements
The spine supports the body, protects the spinal cord, and contributes to movement and stability.
It consists of cervical, thoracic, and lumbar regions, followed by the sacrum and coccyx.
For yoga teachers, understanding basic spinal movement is more useful than memorizing every anatomical detail.
The major movements include flexion, extension, lateral flexion, and rotation.
Spinal Flexion
Flexion generally describes bending the spine forward.
Examples in yoga include many forward folds and the rounded-spine portion of Cat-Cow.
The amount of movement varies between individuals and across different regions of the spine.
Teachers should avoid assuming that every student needs to achieve a deep forward fold.
Spinal Extension
Extension generally describes movement in which the spine bends backward or returns from a flexed position.
Examples include Cobra Pose and other backbending postures.
A backbend does not need to be deep to be useful. Students may benefit from a smaller range of movement, appropriate support, or a different posture altogether.
Lateral Flexion
Lateral flexion involves bending the spine toward one side.
Side bends can help students explore lateral movement and body awareness.
Encourage controlled movement and comfortable breathing rather than asking students to force themselves into a deeper stretch.
Spinal Rotation
Rotation involves turning around the spine’s vertical axis.
Yoga includes many seated and supine twists.
A teacher should avoid treating twisting as a competition to reach the greatest range. The appropriate movement depends on the student, the position, and the purpose of the practice.
Practical Teaching Lesson
When teaching spinal movements, use simple cues, encourage comfortable ranges, and avoid presenting one alignment as universally correct.
For example, instead of telling every student to keep the spine perfectly straight in a forward fold, you might invite them to bend their knees as needed and move within a comfortable range.
Understanding the Major Muscle Groups Used in Yoga
Muscles help produce movement, maintain posture, and stabilize the body.
You do not need to memorize every muscle before teaching your first class. Start with major muscle groups and understand how they contribute to common yoga movements.
The important point is to understand the general function of these muscle groups and how they relate to the movements you teach.
Avoid telling students that a single muscle must be activated in exactly the same way for everyone to perform a pose correctly.
Understanding Joints and Range of Motion
Joints are the places where bones meet. Their structures influence the types and ranges of movement available.
For yoga teachers, the shoulder, hip, knee, wrist, and ankle are particularly relevant.
The Shoulder
The shoulder complex allows a wide range of arm movement.
Its mobility depends on the coordinated movement of the upper arm, shoulder blade, collarbone, and surrounding tissues.
In overhead poses, students may experience different ranges of movement. A teacher should not force the arms into a position that creates discomfort.
The Hip
The hip is a ball-and-socket joint that allows flexion, extension, abduction, adduction, and rotation.
Its movement is influenced by joint structure, surrounding tissues, strength, and individual anatomy.
This helps explain why two students may experience different sensations in the same hip-opening posture.
The Knee
The knee primarily allows flexion and extension, with some rotation when its position permits it.
It also depends on surrounding muscles and other structures for stability.
Teachers should pay attention to knee comfort in lunges, kneeling poses, and deep knee-bending movements. Students should not be pressured to continue a posture that causes pain.
The Wrist
The wrist contributes to many weight-bearing yoga poses.
Students may find Plank, Tabletop, and Downward-Facing Dog challenging because of wrist sensitivity or limited tolerance for loading.
Depending on the student and the movement, options may include reducing the duration, adjusting hand placement, using suitable props, or choosing a different posture.
The Ankle
The ankle contributes to balance and lower-body movement.
Limited ankle dorsiflexion, for example, can affect how comfortably a person moves into a deep squat.
A teacher can offer a shallower squat or other suitable variation rather than insisting that the heels must remain in one particular position.
Flexibility Versus Mobility: What Is the Difference?
Flexibility and mobility are related, but they are not the same.
Flexibility generally refers to the ability of muscles and other soft tissues to lengthen.
Mobility refers to the ability to move a joint through an available range of motion with appropriate control. It can involve flexibility, joint structure, strength, and coordination.
For example, a student may be able to reach toward the floor in a forward fold but struggle to control the movement into and out of the position.
Another student may have a smaller range of motion but demonstrate good control and stability.
Neither situation should automatically be treated as a failure.
Yoga teachers should avoid presenting extreme flexibility as the ultimate goal. Depending on the class, developing strength, coordination, balance, comfort, and body awareness may be equally important.
Why Every Body Is Different
One of the most important lessons in yoga anatomy is that bodies vary.
Differences can arise from:
- Bone proportions.
- Joint shape and structure.
- Limb length.
- Muscle strength.
- Soft-tissue characteristics.
- Previous injuries or surgery.
- Training history.
- Age and general physical condition.
- Fatigue and daily activity.
These differences influence how students experience poses.
For example, two students may both attempt a seated forward fold. One may reach their feet easily, while the other may need to bend their knees or sit on a folded blanket.
The difference does not necessarily mean that one student is performing the pose correctly and the other is not.
The teacher’s role is to help each student find a suitable variation for the purpose of the class.
Functional Movement Versus Perfect Alignment
Traditional yoga instruction often uses alignment cues to help students organize their bodies.
Alignment can be useful, but it should not be treated as a single perfect shape that every student must reproduce.
Consider Warrior II.
A teacher might offer cues about foot placement, knee direction, torso position, and weight distribution. These can help students understand the pose.
However, small differences in stance width, foot angle, or depth may be appropriate for different individuals.
The useful question is not simply, “Does everyone look identical?”
Instead, ask:
- Can the student maintain control?
- Is the position comfortable enough to continue?
- Does the posture support the purpose of the class?
- Is the student able to breathe normally?
- Is there a suitable alternative if the pose is uncomfortable?
These questions encourage practical, student-centered teaching.
How Anatomy Helps You Teach Common Yoga Poses
Understanding anatomy becomes particularly useful when applied to familiar postures.
Downward-Facing Dog
This posture involves the shoulders, arms, spine, hips, knees, and ankles.
Some students may feel tension in their hamstrings or calves. Others may find weight-bearing through the hands uncomfortable.
Possible options include bending the knees, lifting the heels, using a wall-based variation, or choosing another posture.
Do not require students to press their heels to the floor or straighten their legs completely.
Forward Fold
Forward folds involve movement at the hips and spine, with the knees often remaining extended or slightly bent.
Students have different proportions and ranges of motion.
Allowing the knees to bend can reduce the demand on the hamstrings and may help some students find a more comfortable position.
Avoid pulling students deeper into a fold.
Cobra Pose
Cobra involves spinal extension, with support from the arms and back muscles depending on the variation.
The appropriate height depends on the student’s comfort and control.
A lower version may be more suitable than pushing the chest as high as possible.
Encourage students to move within a comfortable range and avoid forcing the lower back into a deep arch.
Warrior II
Warrior II involves the legs, hips, ankles, and trunk.
A wider stance or deeper knee bend may increase the physical demand. Students can adjust the stance and reduce the depth according to their ability.
The front knee should be managed comfortably, without forcing a position that causes pain.
Plank Pose
Plank requires the arms, shoulders, trunk, and legs to work together to support the body.
A student may benefit from placing the knees on the floor or choosing a wall-based variation.
The goal is to find an appropriate level of challenge while maintaining control and comfortable breathing.
How to Use Anatomy When Sequencing a Yoga Class
Anatomical knowledge can help you make better decisions about class structure.
When planning a sequence, consider the movements students will perform and how you can introduce them progressively.
For example, a class that includes several standing balances may incorporate:
- Gentle arrival and breathing.
- Ankle and foot movements.
- Basic standing postures.
- Controlled weight shifts.
- Simple balance practice.
- More challenging balance options.
- Gentle recovery movements.
- Final relaxation.
This structure introduces relevant movement demands before the more challenging portion of the class.
Similarly, if a session includes weight-bearing through the arms, consider whether the students have appropriate experience, whether modifications are available, and whether the sequence gives them time to adapt.
Sequencing should be guided by the class objective, the students’ experience, and your knowledge of the movements involved.
Common Anatomy Mistakes New Yoga Teachers Make
1. Assuming Everyone Should Look the Same
Different bodies can perform the same pose in different ways.
Avoid treating visual similarity as the only measure of success.
2. Forcing Students Into Deeper Stretches
A deeper stretch is not automatically better.
Avoid pushing, pulling, or encouraging students to ignore discomfort.
3. Confusing Discomfort With Progress
A challenging sensation does not prove that a pose is working.
Sharp, sudden, worsening, or otherwise concerning pain should not be ignored. Encourage students to stop the movement and seek appropriate medical advice when needed.
4. Using Too Much Anatomical Terminology
Technical terms can be useful when students understand them, but overly complicated instructions can make a class difficult to follow.
Use simple language first and introduce terminology when it adds value.
5. Making Medical Claims
Yoga teachers should not claim that a particular posture cures an injury, corrects every postural problem, or treats a medical condition.
Stay within your qualifications and refer health-related concerns to suitable professionals.
6. Treating Alignment Rules as Universal
Alignment cues can provide helpful guidance, but they should be adapted to the individual and the purpose of the movement.
7. Ignoring Modifications
A sequence should not depend on every student being able to perform the most demanding version of each pose.
Prepare appropriate alternatives before the class begins.
How to Build Your Yoga Anatomy Knowledge
You can develop your understanding of anatomy gradually.
Start with the structures and movements that appear most frequently in your classes.
Learn the Basic Joint Actions
Understand terms such as:
- Flexion and extension.
- Abduction and adduction.
- Internal and external rotation.
- Lateral flexion.
- Spinal rotation.
Focus on recognizing these movements in familiar yoga poses.
Study Major Muscle Groups
Begin with the muscles around the hips, thighs, abdomen, shoulders, and back.
Learn their broad functions and how they contribute to movement.
You do not need to memorize every attachment point before teaching basic classes.
Observe Different Bodies
When studying or practicing yoga, notice how people approach the same posture differently.
Use these observations to understand why different modifications may be useful, while avoiding assumptions about someone’s anatomy based only on appearance.
Practice Explaining Movement
Choose a familiar pose and explain its main movements in plain English.
For example, you might explain how a student can bend their knees, adjust their stance, or use a block to make a position more comfortable.
Learn From Qualified Professionals
Use reputable anatomy textbooks, qualified anatomy educators, and appropriately trained yoga instructors.
If a question involves an injury, diagnosis, rehabilitation, or medical condition, seek information from a qualified healthcare professional rather than relying on a yoga teaching course alone.
How Yoga Teacher Training Supports Anatomy Learning
A structured yoga teacher-training program can help you connect anatomical concepts with practical teaching.
Instead of studying muscles and joints in isolation, you can learn how they relate to postures, sequencing, verbal cues, modifications, and student observation.
A comprehensive program may cover:
- Basic human anatomy.
- Functional movement.
- Common joint actions.
- Yoga posture analysis.
- Movement preparation.
- Modifications and prop use.
- Teaching methodology.
- Practical teaching sessions.
- Professional boundaries and safety.
A 200-hour Yoga Teacher Training Summer Intensive may be worth considering if you want a structured foundation for teaching yoga.
Before enrolling, review the curriculum and check how anatomy is taught, how much supervised teaching practice is included, and what qualifications or recognition the program provides.
The goal is to develop knowledge that you can apply responsibly when guiding real students.
A Simple Anatomy Checklist for Yoga Teachers
Before teaching a posture, ask yourself:
- What is the main movement involved?
- Which joints and muscle groups contribute?
- What demands does the posture place on the body?
- Is there a simpler variation?
- Could a prop make the movement more accessible?
- Can students breathe comfortably?
- What should students do if the posture causes pain?
- Am I staying within my professional role?
You will not always have a perfect answer to every question. The checklist is designed to encourage thoughtful teaching rather than create unnecessary fear.
Frequently Asked Questions
What anatomy should a yoga teacher know?
Yoga teachers should understand basic skeletal anatomy, major muscle groups, common joint actions, spinal movements, balance, stability, mobility, and individual anatomical differences. They should also understand the limits of their professional role.
Do I need to study anatomy before becoming a yoga teacher?
You can begin learning anatomy as part of your yoga teacher education. A basic understanding is important for responsible teaching, and continued study can help you develop more confidence over time.
How much anatomy is required for a 200-hour yoga teacher training program?
The exact curriculum varies by provider. Review the program syllabus to understand which anatomy topics are covered and whether students have opportunities to apply that knowledge during practical teaching.
Why do two students perform the same yoga pose differently?
People have different joint structures, proportions, mobility, strength, movement histories, and comfort levels. These differences can influence the shape and sensation of a pose.
Does better flexibility mean better yoga practice?
No. Flexibility is only one aspect of movement. Strength, control, balance, coordination, breathing, and awareness can also be important depending on the practice.
Should yoga teachers correct every alignment difference?
No. Teachers should consider the purpose of the pose, the student’s comfort, and the demands of the movement. Not every difference in appearance requires correction.
What should a yoga teacher do if a student experiences pain?
The teacher should encourage the student to stop the movement and avoid pushing through the pain. If the pain is persistent, severe, unusual, or concerning, the student should seek advice from an appropriately qualified healthcare professional.
Can yoga anatomy help with class sequencing?
Yes. Understanding movement demands can help teachers select preparatory poses, arrange movements progressively, provide suitable modifications, and manage class intensity.
Can a yoga teacher diagnose an injury by observing a pose?
No. Yoga teachers should not diagnose injuries or medical conditions unless they hold separate qualifications that authorize them to do so. They should stay within their training and refer students to appropriate healthcare professionals when necessary.
How can new yoga teachers improve their anatomy knowledge?
Start with basic joint actions and major muscle groups, study familiar poses, practice explaining movements, and learn from qualified educators. Apply the knowledge gradually and continue studying as your teaching experience grows.
Final Thoughts
Yoga anatomy gives teachers a practical foundation for understanding movement, adapting poses, and respecting the differences between students.
You do not need to know every anatomical detail to begin developing your teaching skills. What matters is building a sound understanding of the body, avoiding rigid assumptions, and learning when to offer an alternative.
Focus on the major joints and muscle groups first. Study how familiar poses work. Practice giving clear instructions and prepare modifications before class. Most importantly, remember that a yoga teacher’s responsibility is not to make every student look identical, but to guide an appropriate practice with care and sound judgment.
If you want to develop these skills through structured education and practical teaching experience, explore the 200-hour Yoga Teacher Training Summer Intensive and review whether its curriculum matches your learning goals.